

Preferences
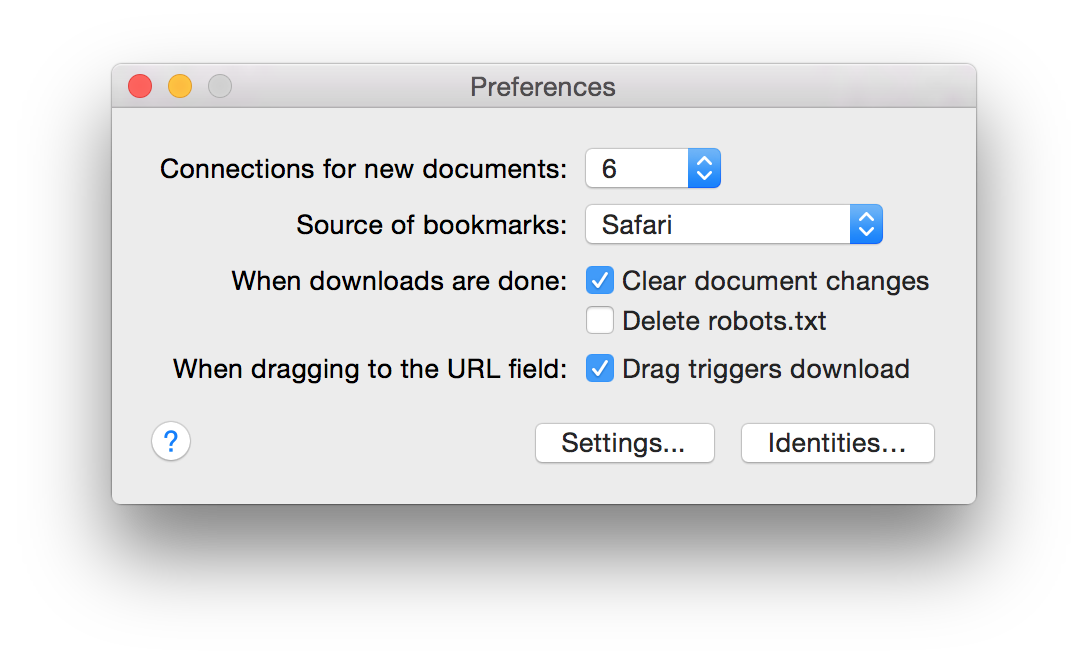
The Preferences window lets you customize the SiteSucker application.
Connections for new documents
Sets the number of simultaneous Internet connections for new SiteSucker documents.
Source of bookmarks
Use this control to specify from which web browser bookmarks should be read. After bookmarks are read, they are displayed in the Bookmarks menu. You can choose from the following options:
- No Bookmarks - Do not show the Bookmarks menu.
- Camino
- Chrome
- Firefox
- Opera
- Safari
If no bookmarks were found for a browser, it will be disabled in the list.
Clear document changes
Check this box to have SiteSucker clear a document's "dirty" flag when the download ends on its own or is stopped. This allows you to close an inactive SiteSucker window without being asked to save changes made to the document.
Delete robots.txt
Check this box to have SiteSucker delete any robots.txt files when downloads are done.
Drag triggers download
Check this box to have SiteSucker automatically start downloading after a string or file is dragged into the URL text field.
Settings
Click this button to display a panel that allows you to add, delete, and rename the saved settings files that are listed in the Settings menu.

To add a settings file, click the  button. This will save the current settings of the active document in a settings file and add its name to the list in the window. If no document is open, the user defaults are saved.
To remove settings files, select them in the table and click the  button.
To rename a settings file, double-click on its name in the table, enter a new name, and press return. All names in the table must be unique.
Settings files are saved in the SiteSucker sandbox. Previous versions of SiteSucker allowed you to save settings files anywhere. To add a previously saved settings file to the sandbox, drag it to the list in the settings panel.
Identities
Click this button to display a panel that allows you to add and edit custom identities. You can use this panel to add identities to the standard list of web browsers provided in the Identity control in the Request settings.

To add a custom identity, click the button and enter the name, version, platform, and user agent string.
To remove a custom identity, select it in the table and click the button.