

Log
The Log window keeps track of printed checks. It also allows you to populate fields in the main window from items in the log. You can open the Log window by choosing Log… in the Bank Check Printer menu.

Whenever you print checks, the information that you entered is automatically added to the log. After an item has been added to the log, you can edit an individual field by double-clicking on it. For example, you can add a check number to an item by editing the Check # field. Use the tab key to edit the next field, and the return key to finish editing. To add a new line to an address, type option-return.
You can also add an item to the log by clicking the  button in the window's toolbar and entering information for each field.
To remove items, select them in the table and click the  button in the window's toolbar or press the delete key.
You can use the Search field in the window's toolbar to limit the log items displayed to those containing the specified text.
When you copy items selected in the Log window, a tab-separated string is added to the pasteboard. This string can be used to paste table data into a text editor, such as TextEdit, or a spreadsheet, such as Numbers.
Choose Save in the File menu to save changes to the log. When the Log window is closed, any changes are automatically saved.
Choose Print in the File menu to print the log.
Action Pop Up Button
The action pop up button in the window's toolbar provides a menu that allows you to populate fields in the main window from items in the log. It also includes menu items that allow you to import data into and export data from the log.

To populate the fields for a check in the main window, select an item in the log and then choose the Autofill menu item for the particular check. Autofill menu items are disabled for checks that are not revealed in the main window, and all Autofill menu items are disabled unless you select a single item in the log.
To import data into the log, you first need to export checking account transactions from your financial software to a CSV (comma-separated values) file. Next, choose the Import From CSV… menu item in the pop up button, and select the CSV file that you exported in the Open dialog. This displays the Import From CSV dialog.
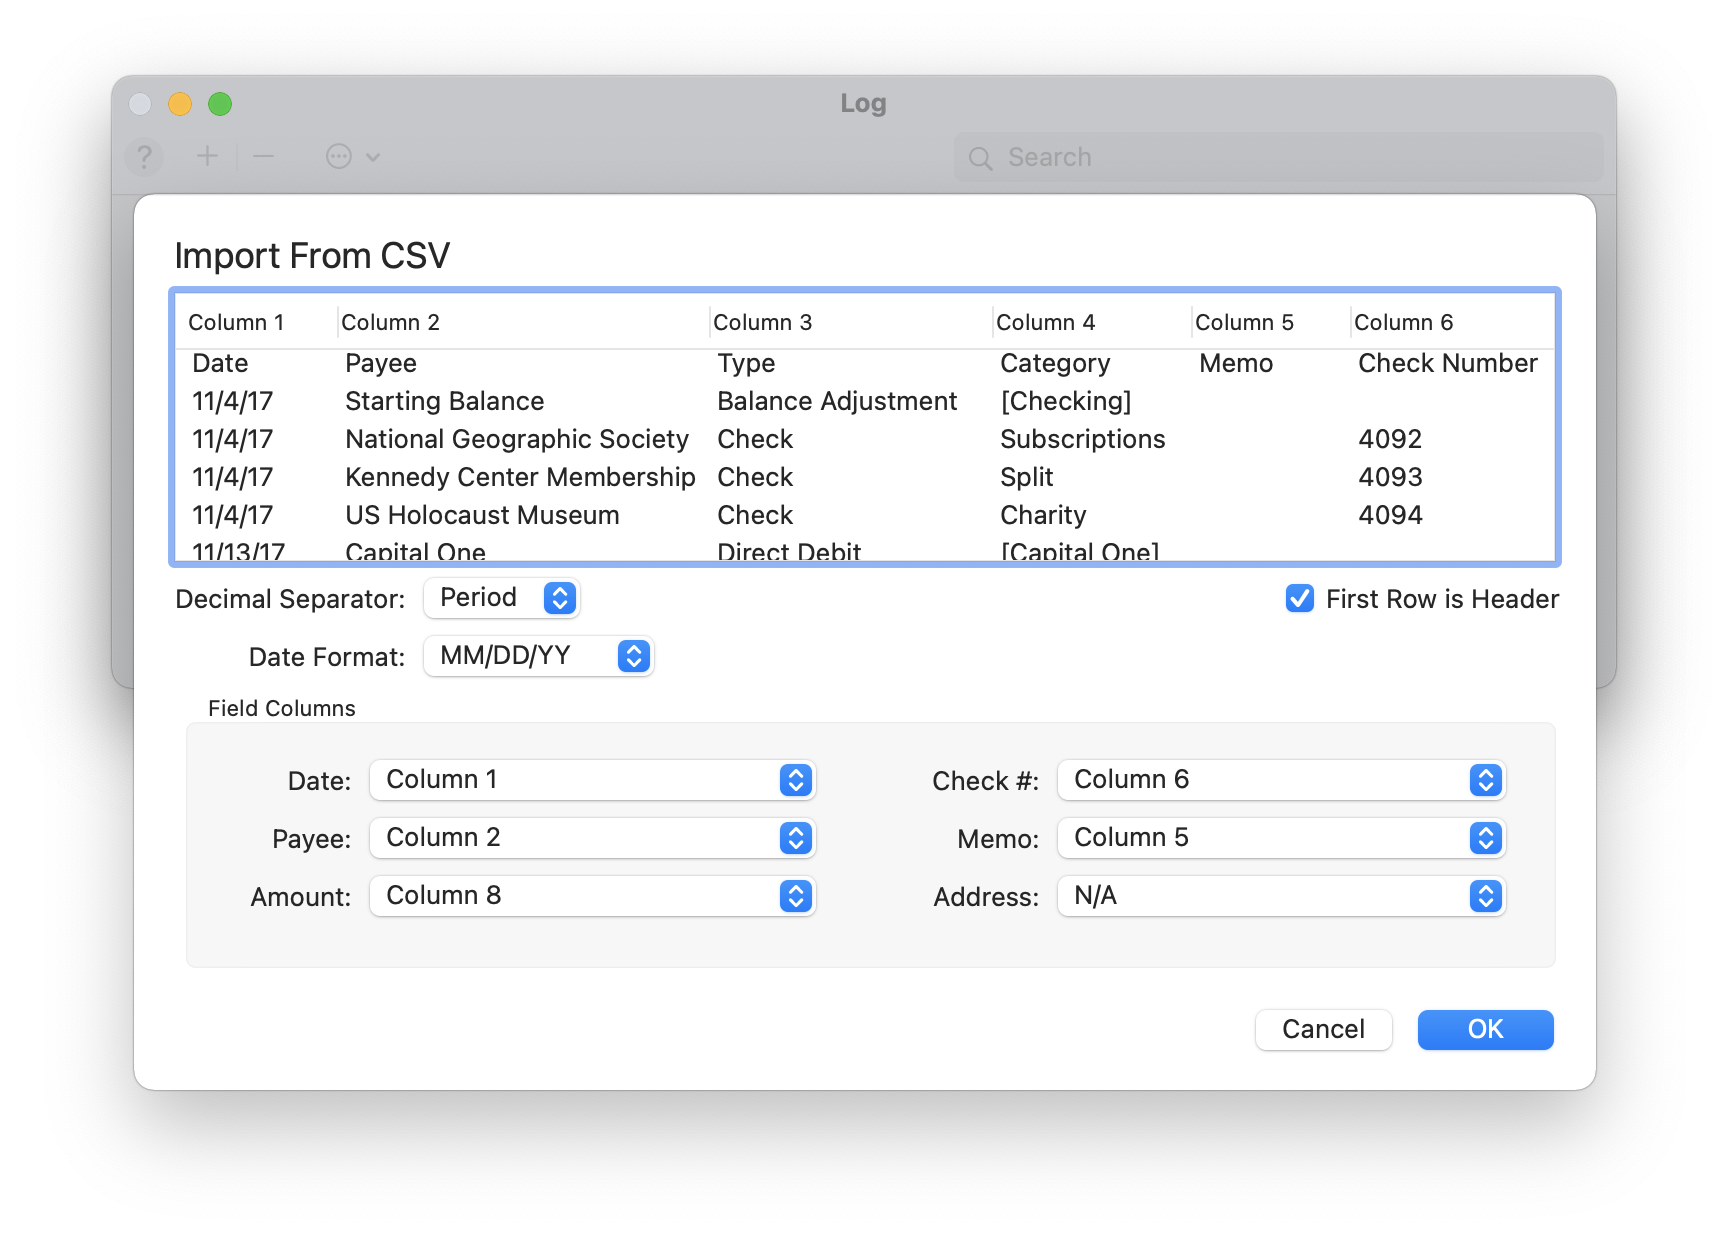
The table in the dialog displays the data being imported. Use the pop up buttons in the dialog to choose the columns in the CSV file that correspond to various Bank Check Printer fields. Choose N/A if there isn't a corresponding column. Make sure that you choose a column for the Check # field, because the application will only import transactions that have a check number. If the first row of the CSV file contains header information, the First Row is Header button should be checked. Next, choose the appropriate decimal separator for the Amount field and the date format that best matches the date strings in the CSV file. Finally, click the OK button to import the data.
To export data from the log, select the items that you would like to export, and choose the Export to CSV… menu item in the action pop up button. In the Save dialog, specify a name and location for the file, and click the Save button to export the selected items to a CSV file.