
Preferences
The Preferences window lets you customize the Bank Check Printer application. If the default layout is not appropriate for your checks, you can change it in the preferences. You can change the check style (Standard, Voucher, or Wallet), modify the font, choose a signature image, choose a background image, or adjust the positioning of printed fields on checks. These custom settings are saved as presets, and you can create as many presets as you need to accommodate all of your checks. You can open the Preferences window by choosing Preferences… in the Bank Check Printer menu.
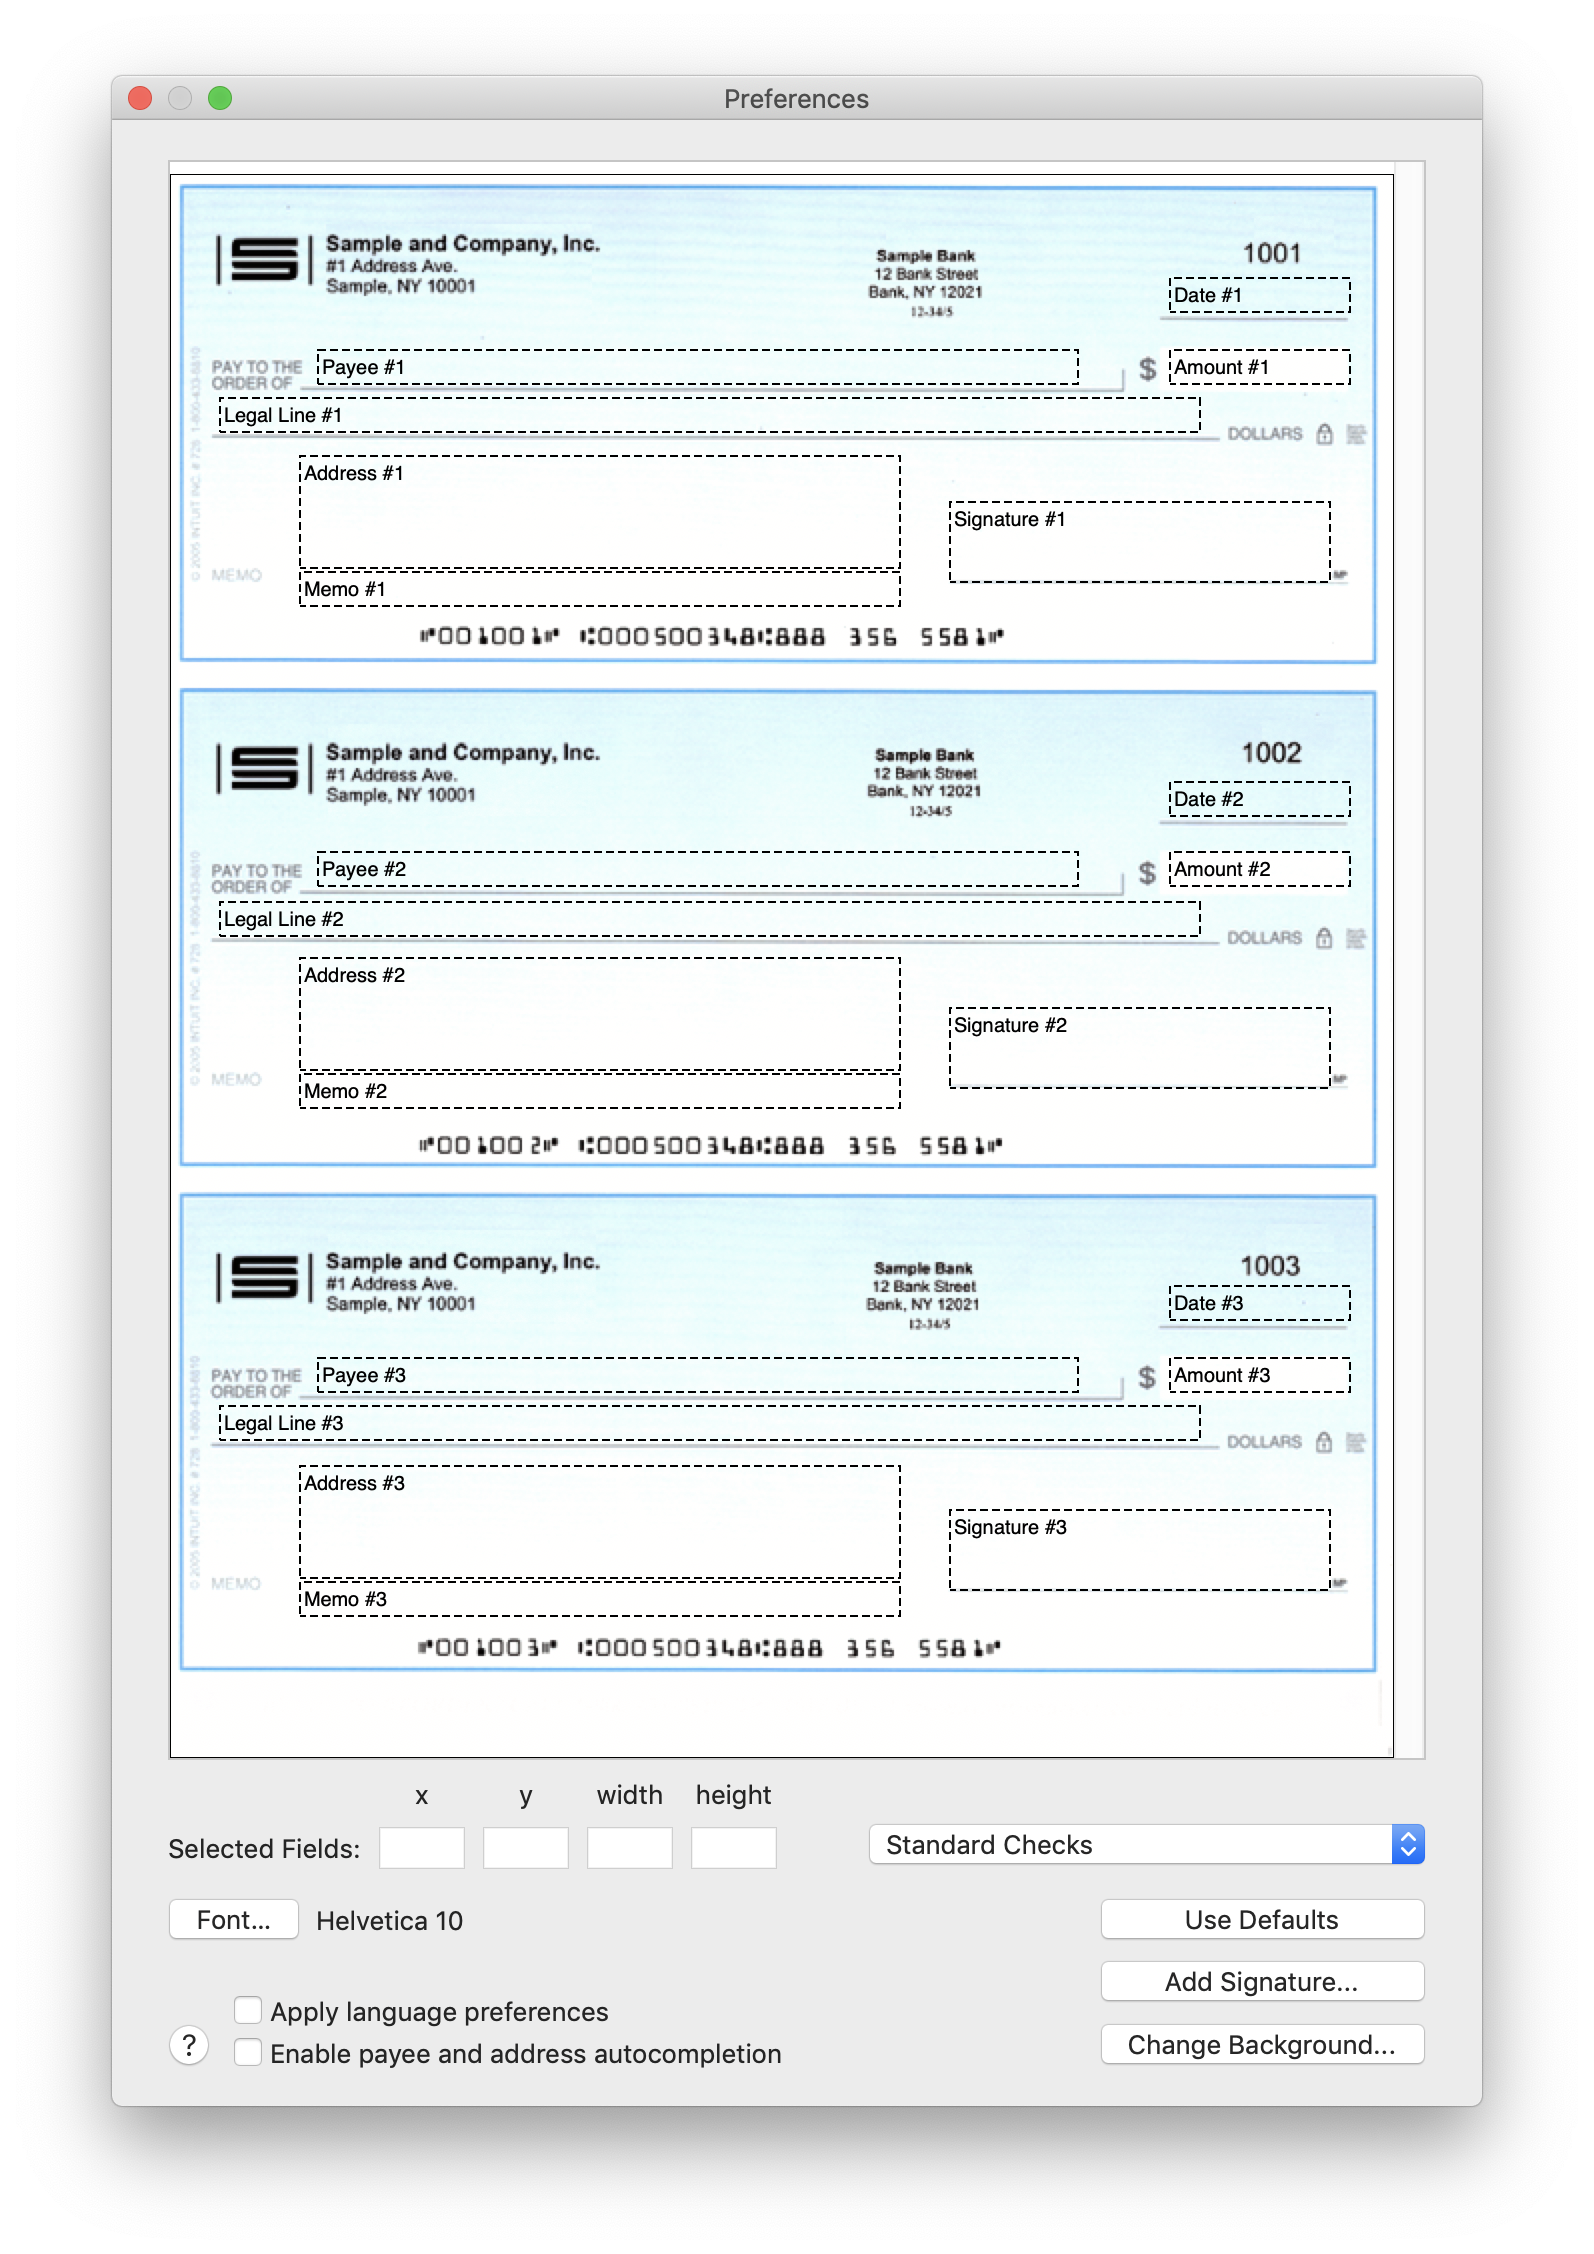
The pop-up button determines which preset is used for printing. Make sure that the selected preset has the check style (Standard, Voucher, or Wallet) appropriate for the checks you intend to use. You can modify the existing preset or create a new preset for your checks by choosing Edit Presets in the menu. (See the Presets topic below.)
For best results, scan a sheet of your checks and use the scanned image as the window's background image. The scanned image can be a tiff, png, jpeg, or gif, and the image size should be 612 by 792 pixels or some multiple of this size. If the image is not the correct size, Bank Check Printer will resize it. Click the Change Background... button to set the window's background image. Bank Check Printer fields can then be adjusted until they align with fields on the image.
The easiest way to position fields on the image is to select them and then drag the fields to where you want them. You select a field by clicking on it. To select more than one field, hold down the shift key while clicking on the field. You can also use the arrow keys to adjust the position of the selected fields. Text boxes at the bottom of the window let you change the position and width of the selected fields. Field heights are determined by the font size, although the height of the signature field can be changed using the text box. Enter a value and press the return or tab key to apply the change.
To choose an image for your signature, click the Add Signature... button and select an image. The signature image can be a tiff, png, or gif. Bank Check Printer will scale the image to fit within the signature field. To remove the signature image, click the Remove Signature button.
To modify the font used for your checks, click the Font button and select a font in the Fonts window.
To remove the signature image, and restore the default font, field positions, and background image, click the Use Defaults button.
Apply language preferences
By default, the US English locale is used for printing checks. Specifically, the US date format, US dollar, and English language are used for the date, amount, and legal line fields. When the Apply language preferences box is checked, Bank Check Printer uses the Language & Region settings in the System Preferences to format these fields. This means that the date format, currency, and the language used on the legal line are determined by the System Preferences. If the currency specified in the Language & Region settings does not include cents, then Bank Check Printer will not include cents in the amount or legal line fields.
Enable payee and address autocompletion
Check the Enable payee and address autocompletion box to have Bank Check Printer provide an autocompletion pop-up menu for the payee and address fields. Then, when you start to enter a name in one of these fields, the autocompletion menu will display names from your Contacts app that match what you are typing. If you select a name in the menu, that name (or name and associated address) will be entered in the field.
Presets
Bank Check Printer allows you to create multiple presets for your checks. Each preset can have its own check style, font, signature image, background image, and field positions. To add, remove, or rename presets, click on the pop-up button and choose Edit Presets... in the menu. This will display the Presets sheet.
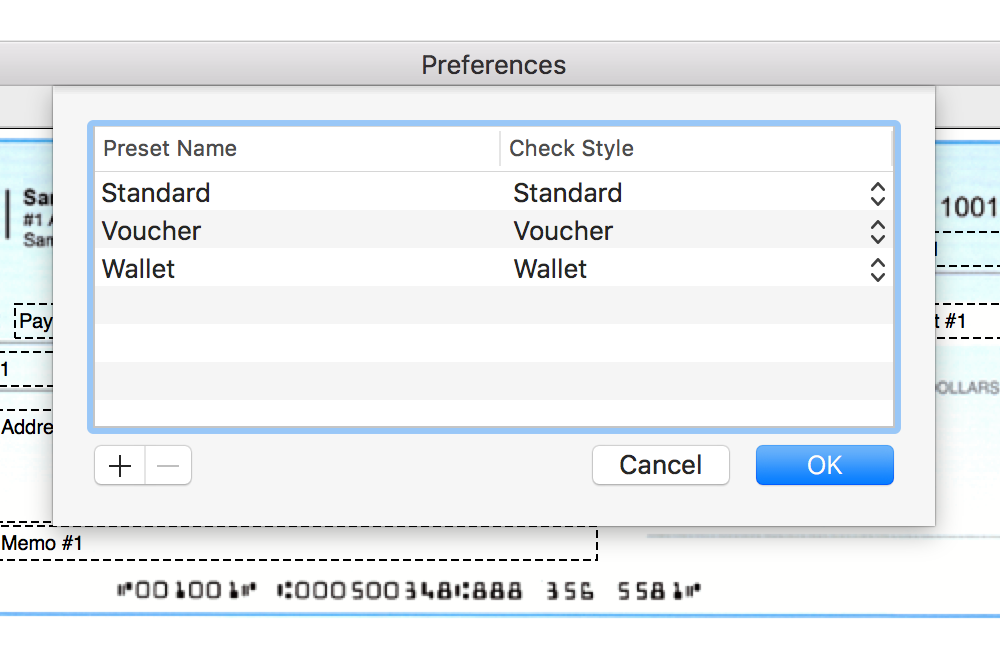
To add a preset, click the add (+) button. This will create a new preset with the Standard check style, default font, default field positions, and default background image.
To remove existing presets, select them in the list and click the delete (-) button. If all presets are selected, the delete button is disabled because at least one preset is required.
To rename a preset, double-click on its name in the list, enter a new name, and press the return key.
Click the Check Style pop-up menu to change the preset's check style.
When you are finished editing the presets, click the OK button to save your changes and close the Presets sheet, or click the Cancel button to abandon your changes.
Exporting and Importing Presets
Bank Check Printer provides the ability to export and import presets, allowing you to share your presets with other Bank Check Printer users. Specifically, you can export your preset to a property list file, send the file to another user, and then the other user can import your preset into their Bank Check Printer preferences from this file.
To export a preset:
- Select the preset that you want to export in the pop-up button.
- Choose File > Export Preset, which displays a Save dialog.
- Specify a name and location for the property list file in the dialog.
- Click the Save button to export the preset to the file.
To import a preset:
- Choose File > Import Preset, which displays an Open dialog.
- Select the property list file to open in the dialog.
- Click the Open button to import the preset from the file, making it the selected preset.